Handmade Christmas Stocking

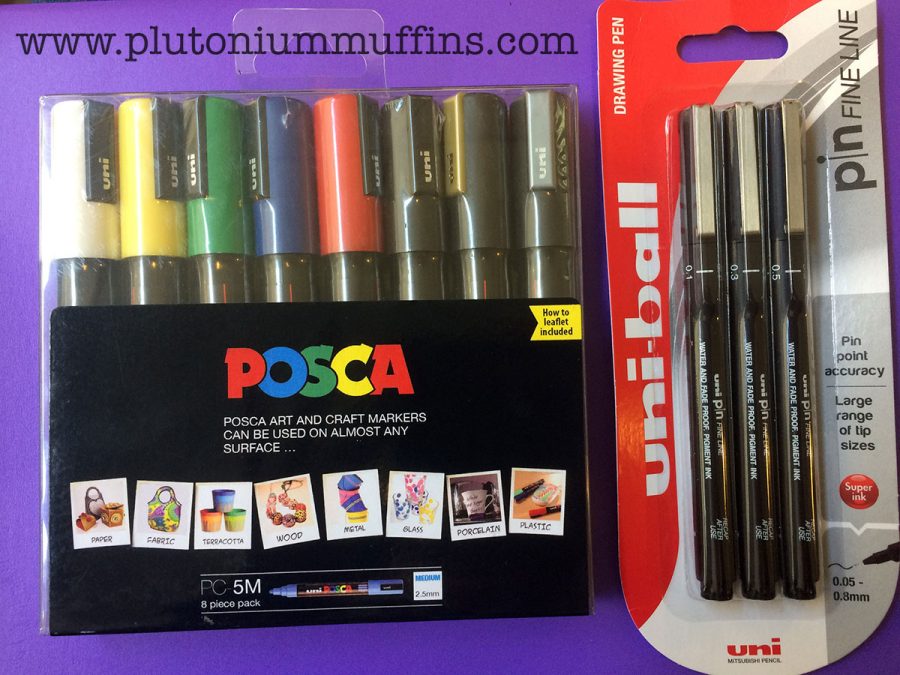
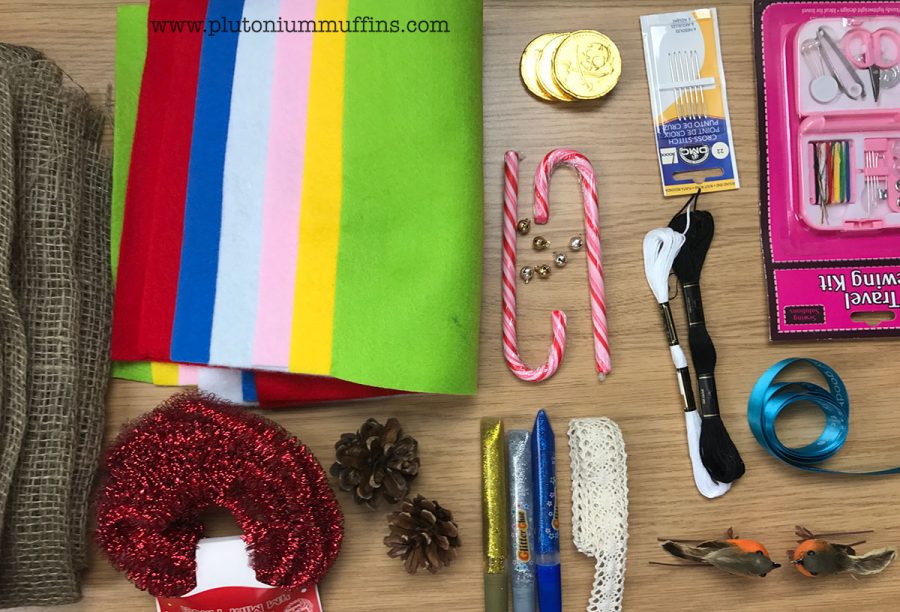
A few weeks ago the team at Turtle Mat asked if I’d like to take part in a Christmas Stocking challenge. They’ve done blogger craft campaigns for a couple of years, and I was keen to get involved. A few days later, a box arrived filled with some of the loveliest craft supplies. I was good to go!

Stocking Inspiration

I left the box in my craft room for the last couple of weeks while I’ve considered what to do. I’ve found it a little hard to get into the Christmas spirit, but on Thursday at work I was challenged to decorate a gingerbread house. While sitting in the kitchen decorating it, inspiration struck. I was going to do something with the essence of gingerbread.

Finished the gingerbread house! 🎄 #gingerbread #gingerbreadhouse #christmas #decorate #colour

A photo posted by Corrie Berry (@plutoniummuffins) on

"<yoastmark

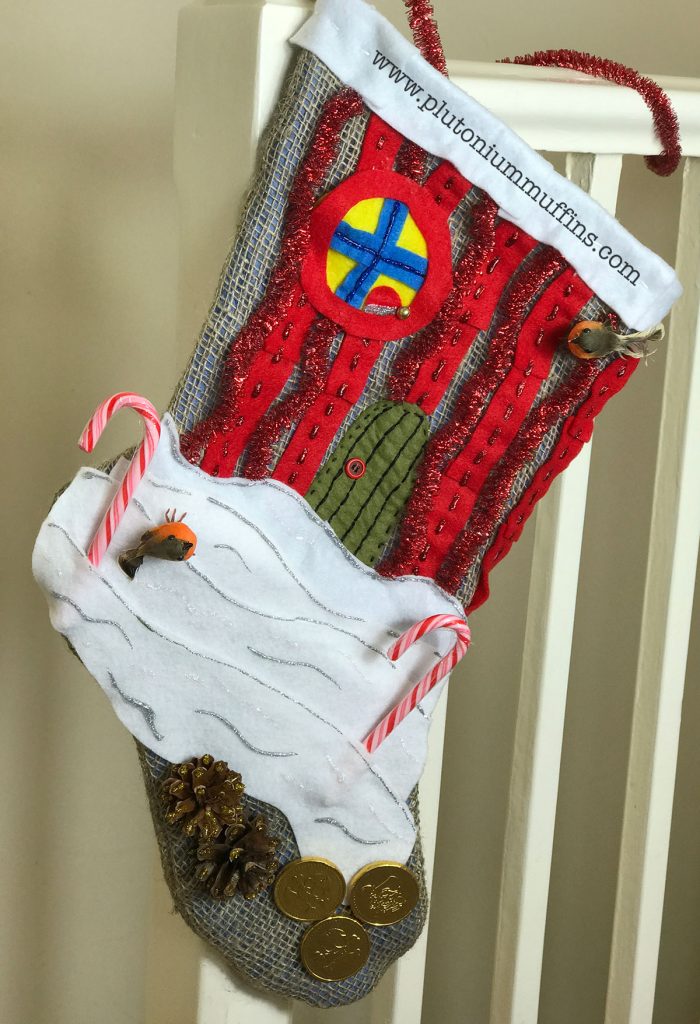
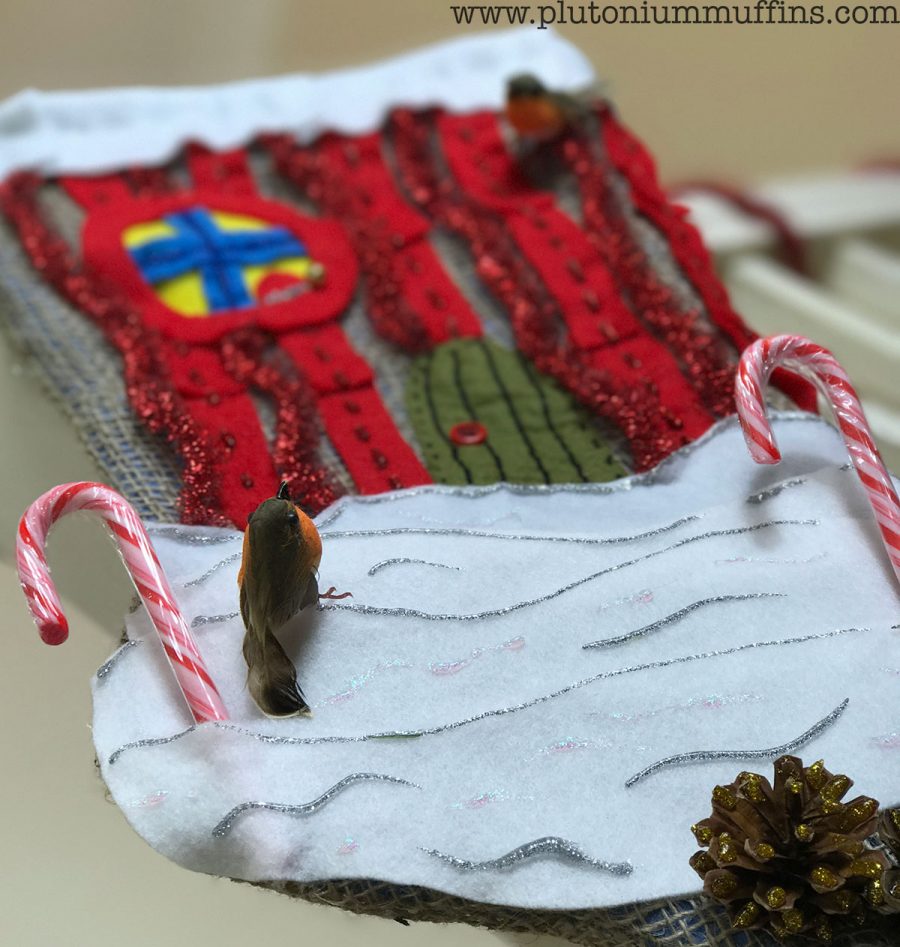
As all ideas do, it evolved into something I wasn’t really expecting. I started out with the gingerbread house idea, which turned into something akin to the old woman who lived in a shoe, which then morphed into what I ended up with, a festive little house on a stocking that we will be able to hang for years to come.

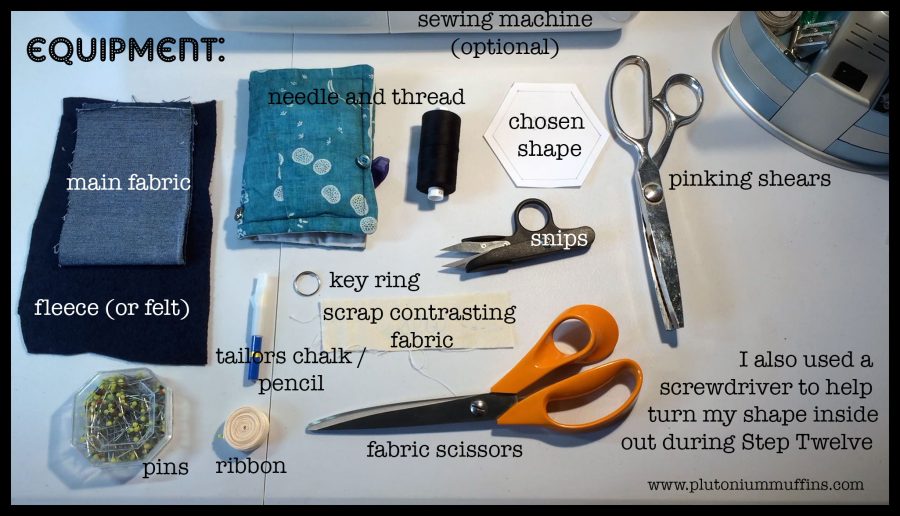
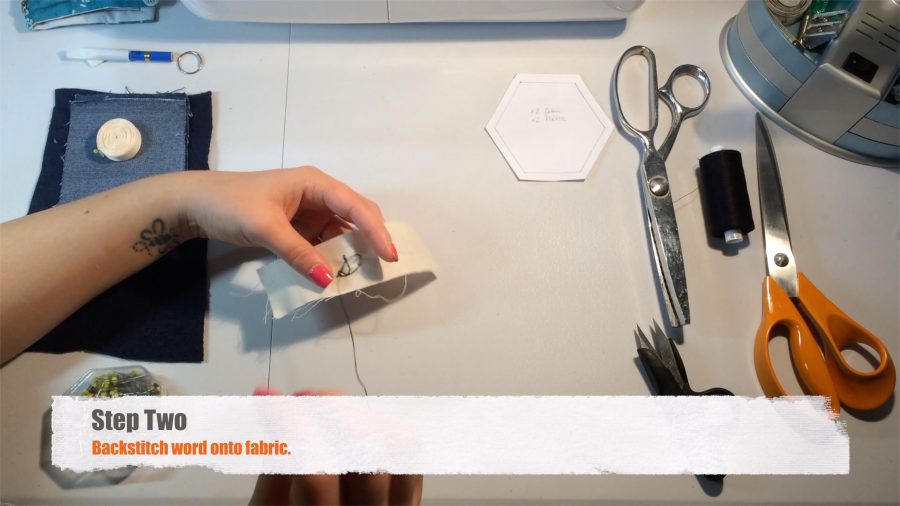
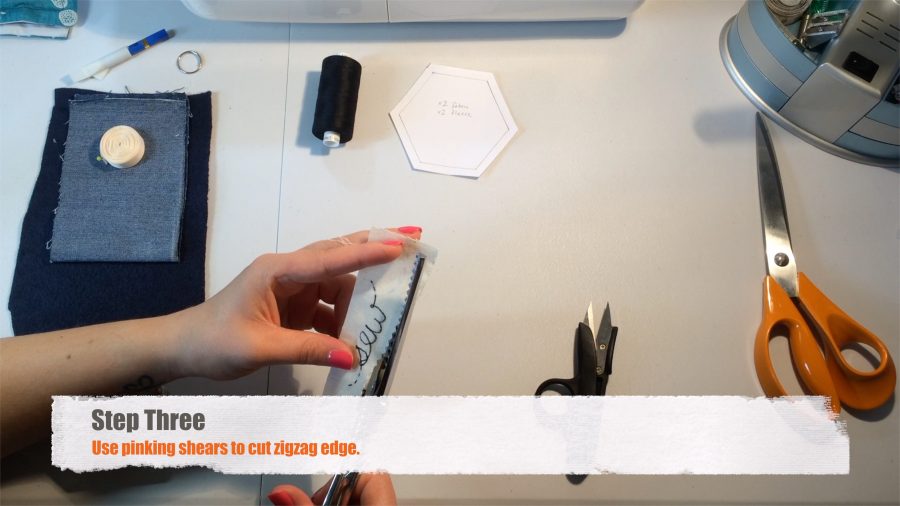
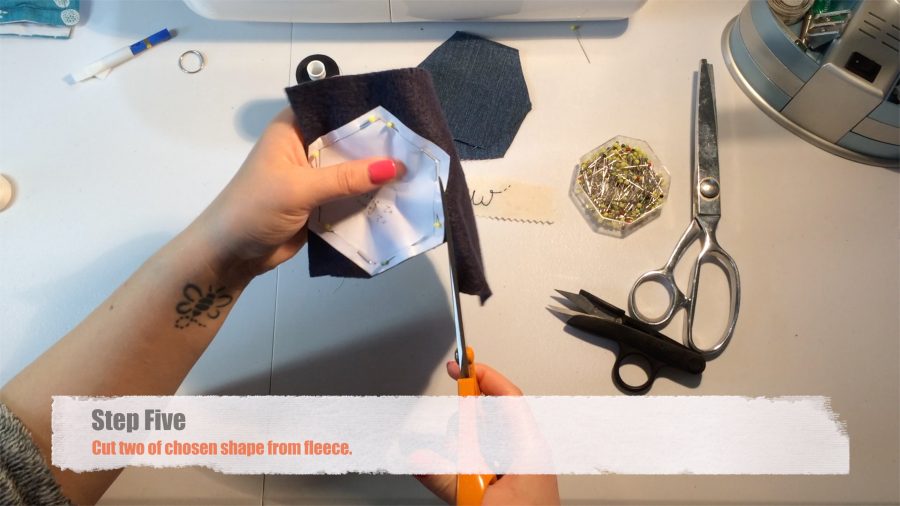
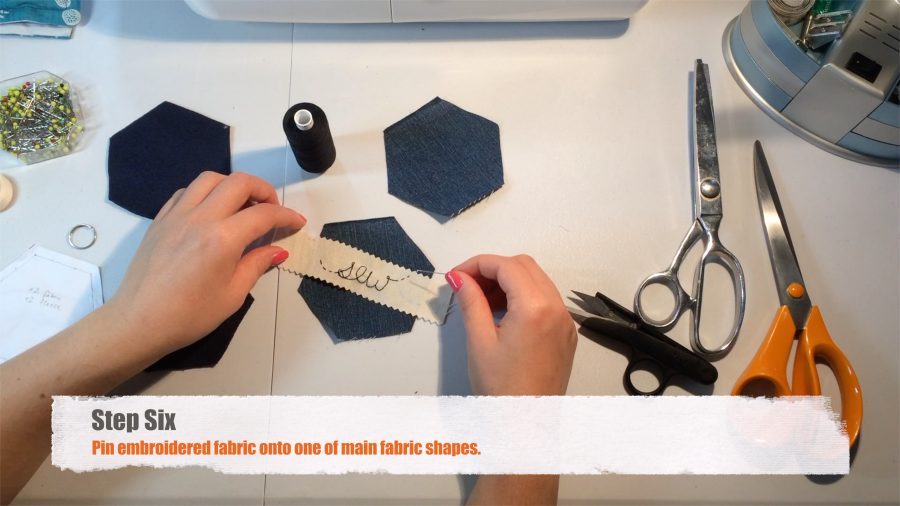
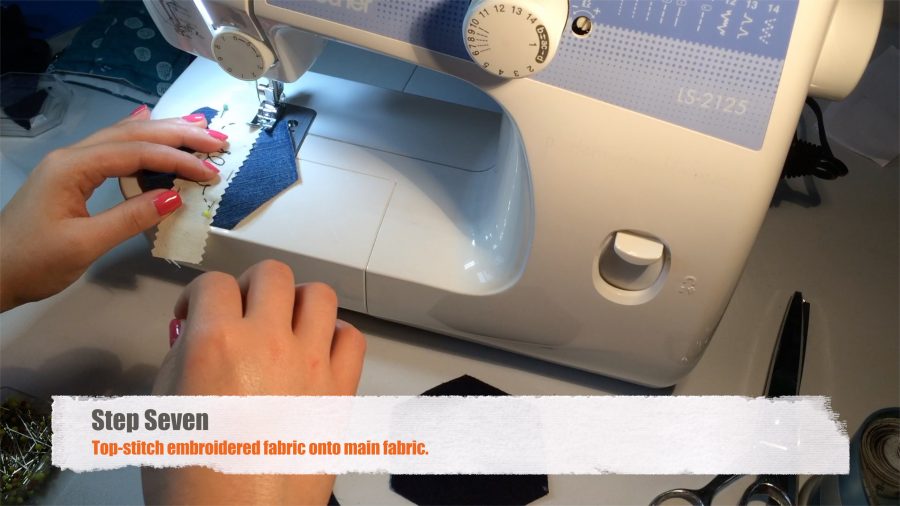
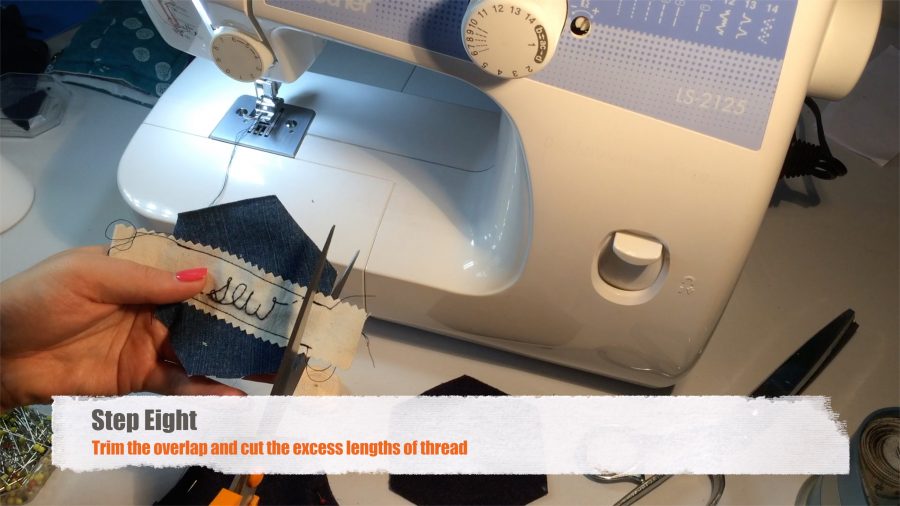
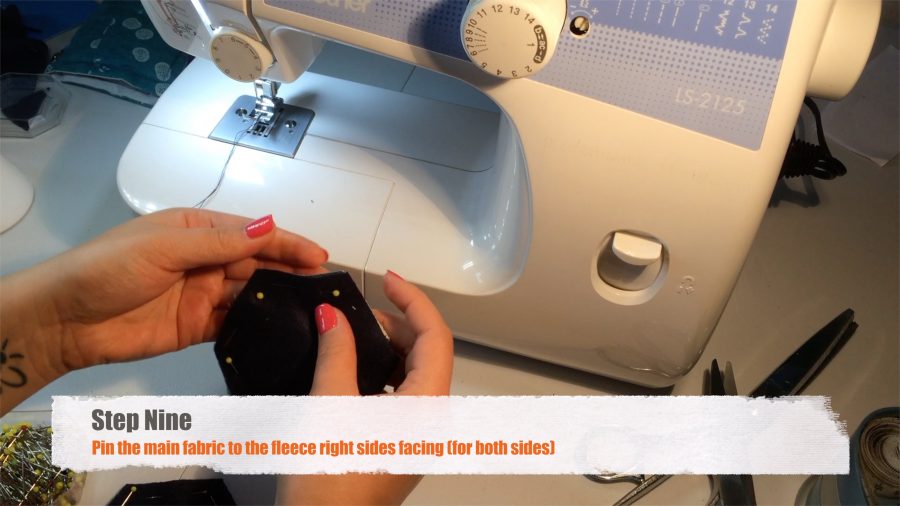
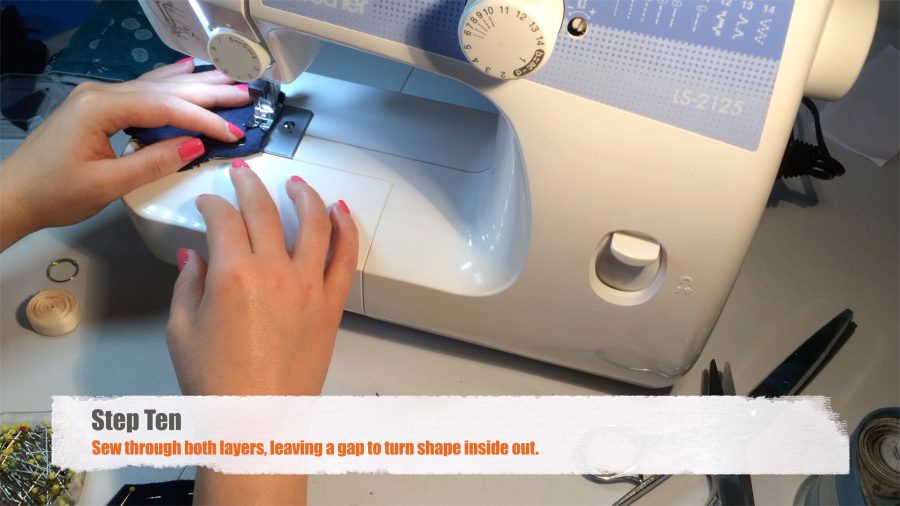
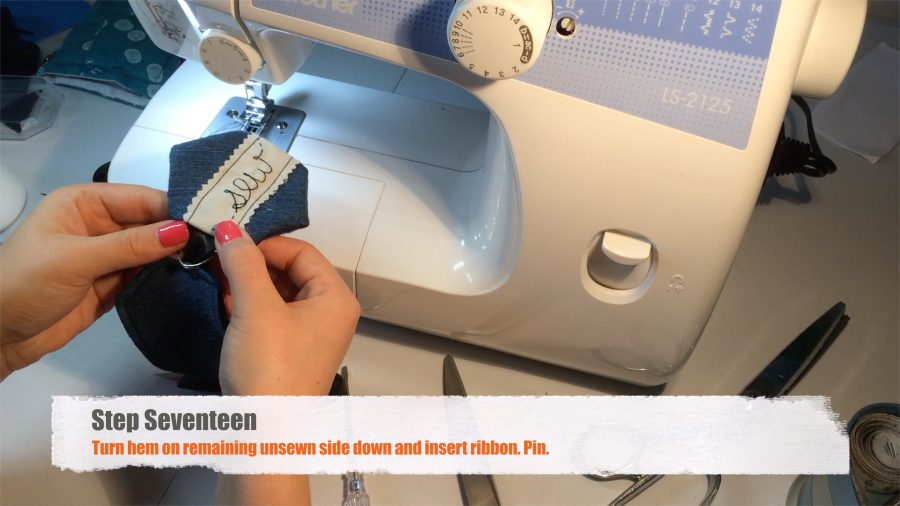
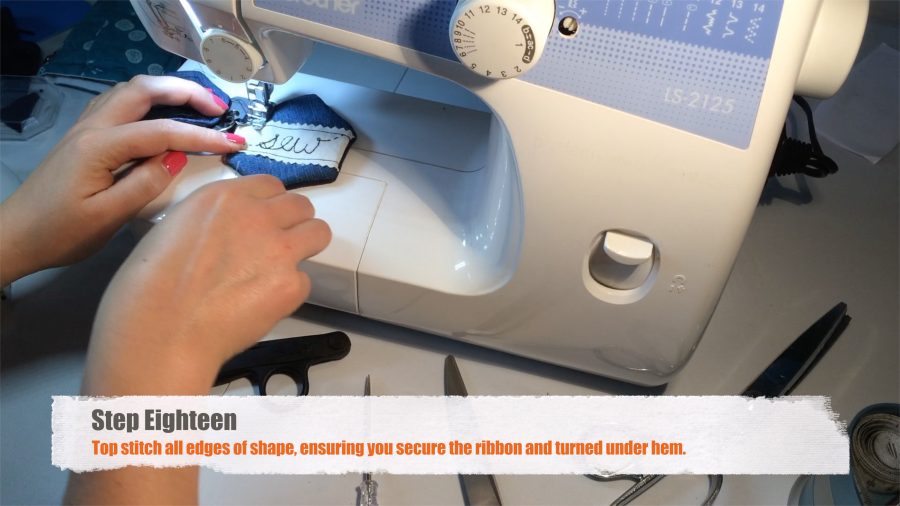
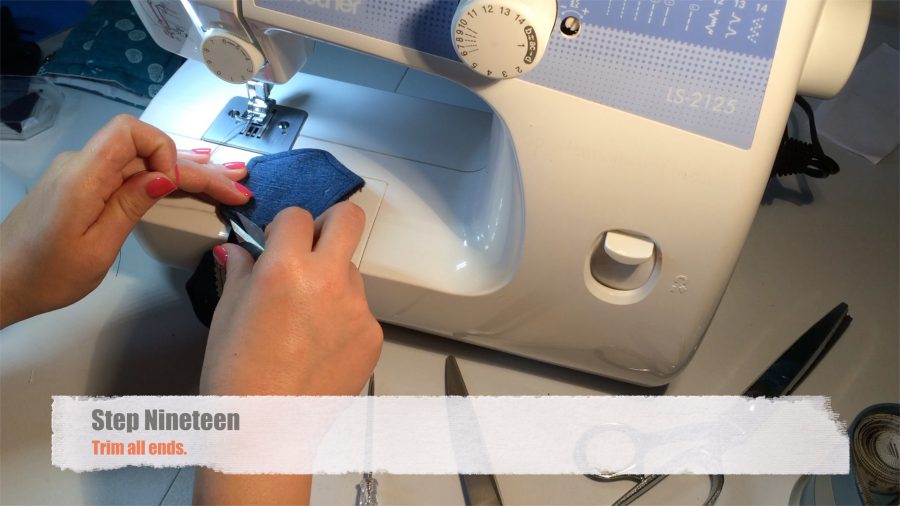
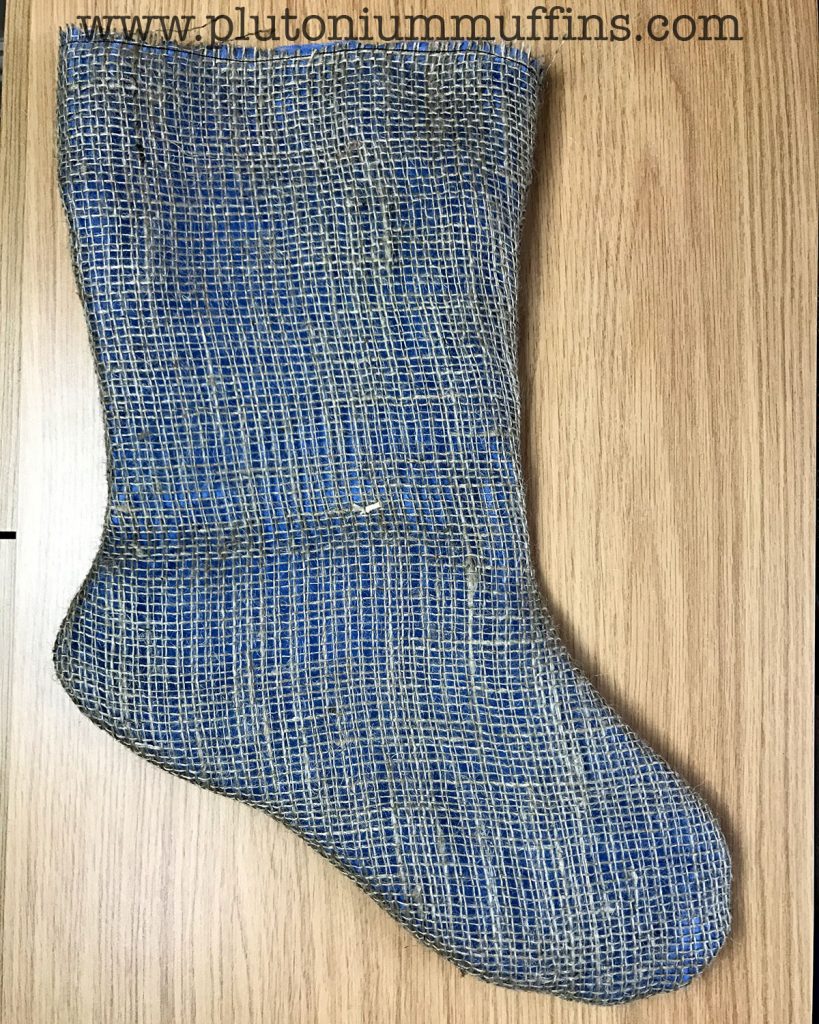
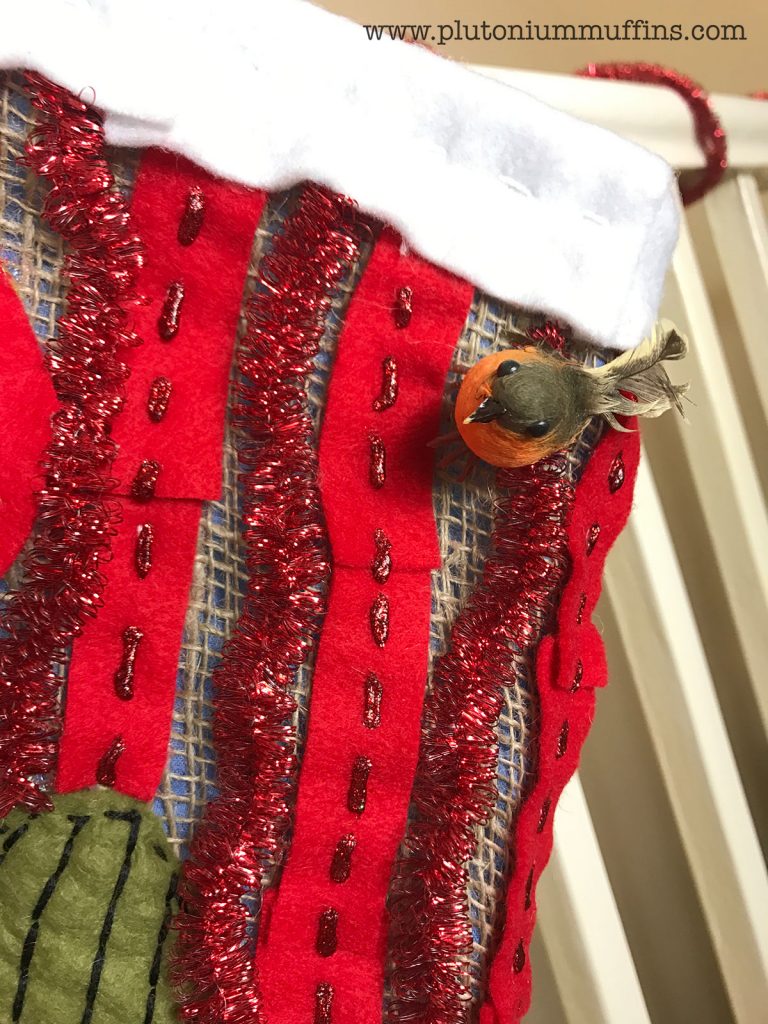
The hessian that I was provided became the base, and I sewed it to some blue fabric to give myself something solid to work on. I then sewed the two halves together so that it is actually a working stocking that I might even use to gift John some things next weekend! With embroidery thread, glue gun in hand and all the bits I was provided by Turtle Mat (as well as some of my own), I created something that I think is really rather cute.

The base of my stocking.

The Finished Stocking

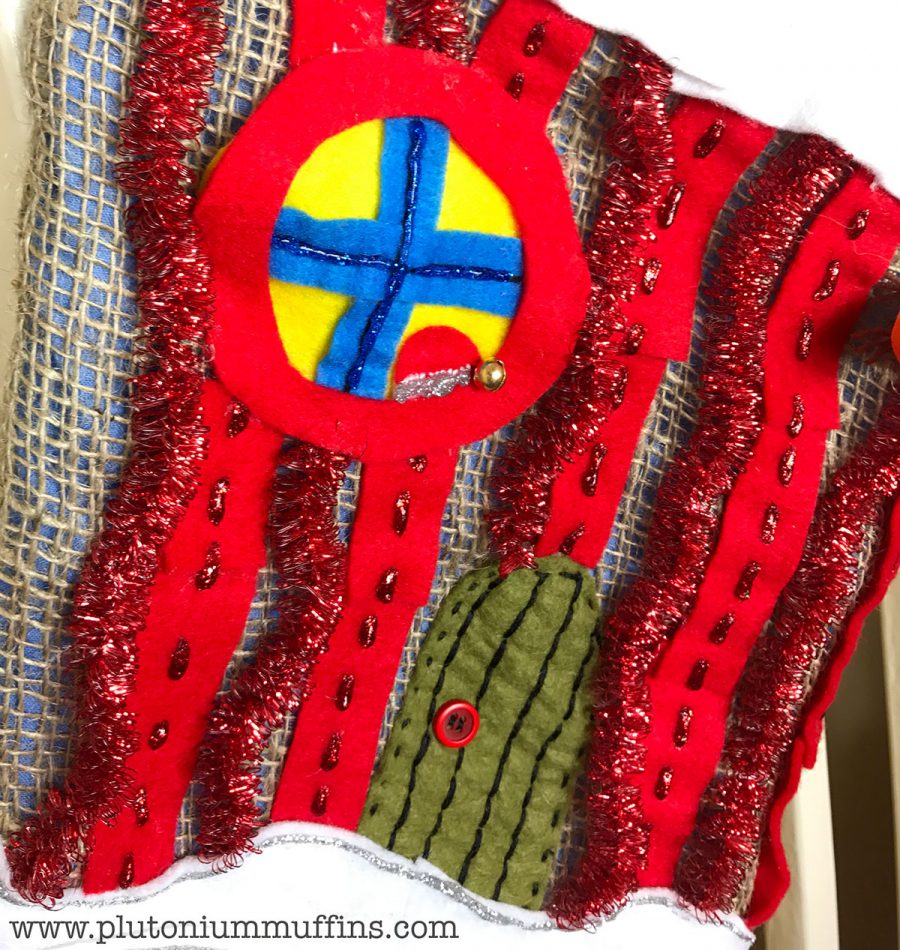
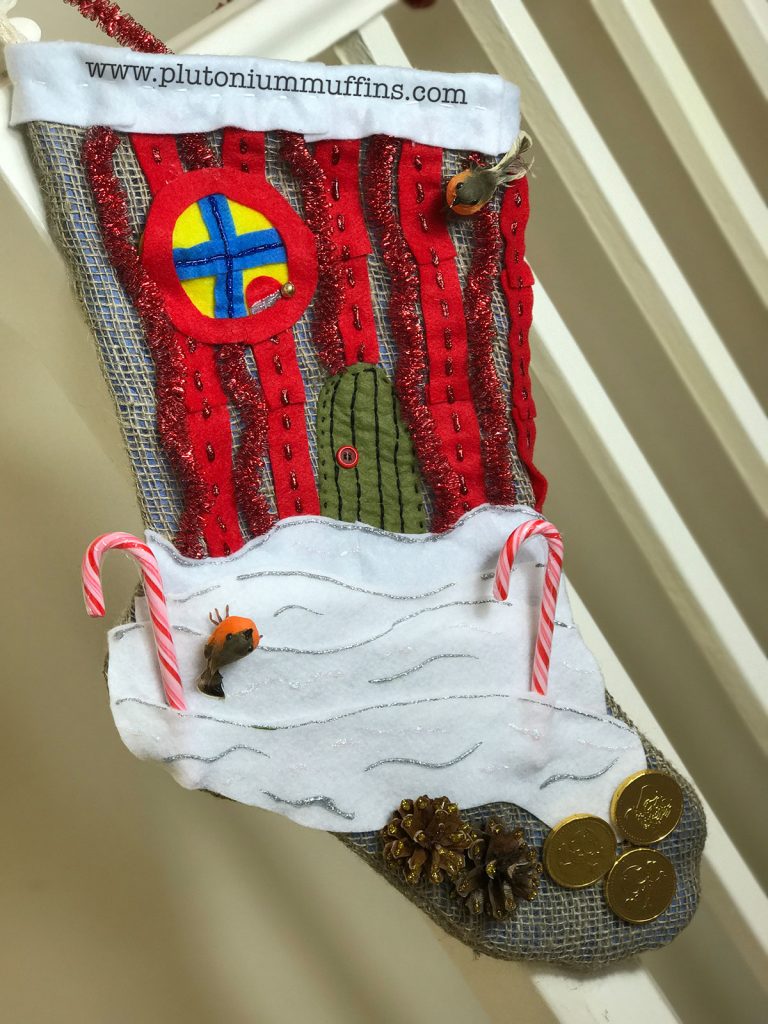
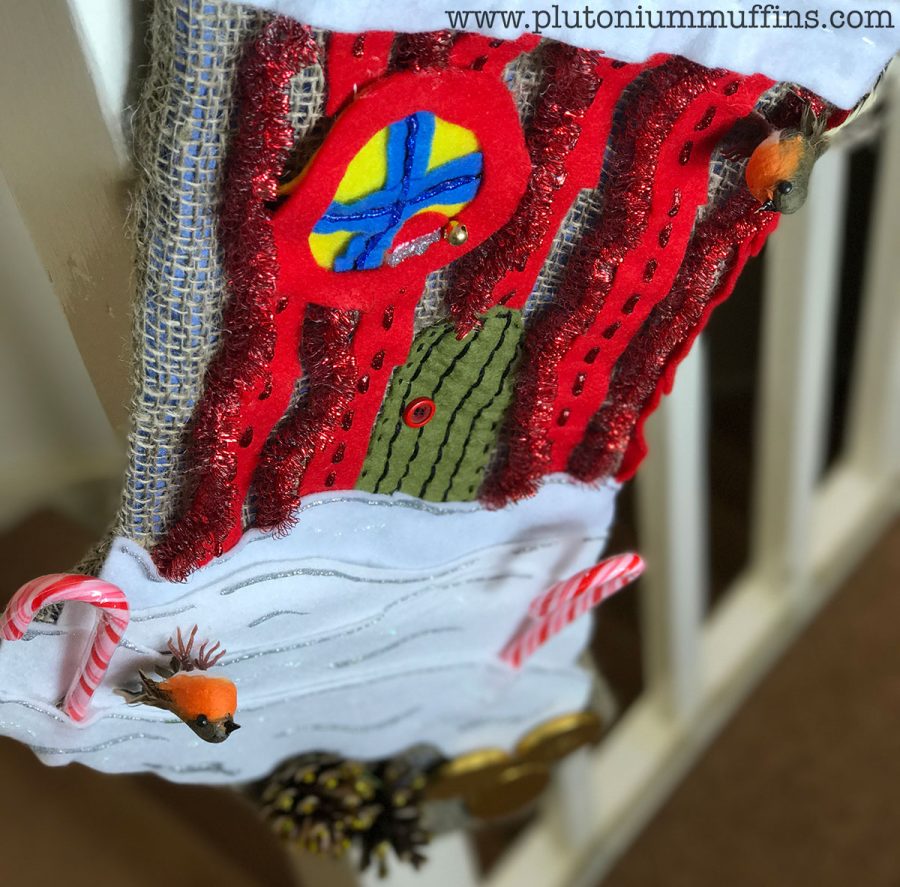
The edible bits, two candy canes and three chocolate coins, are removable. Who says gifts can only go on the inside of the stocking?! I was more restrained than normal and only put one bell on it in the form of the little Santa peeking out of the window… Believe it or not, there’s actually a whole face under that red felt that makes up the window. I didn’t like the look of the edge of the window the first time I did it, so it had to get covered. I think it makes it slightly cuter!

The full Christmas stocking.
Close up of the little Santa poking out of the window.
The robins are so amazingly cute.

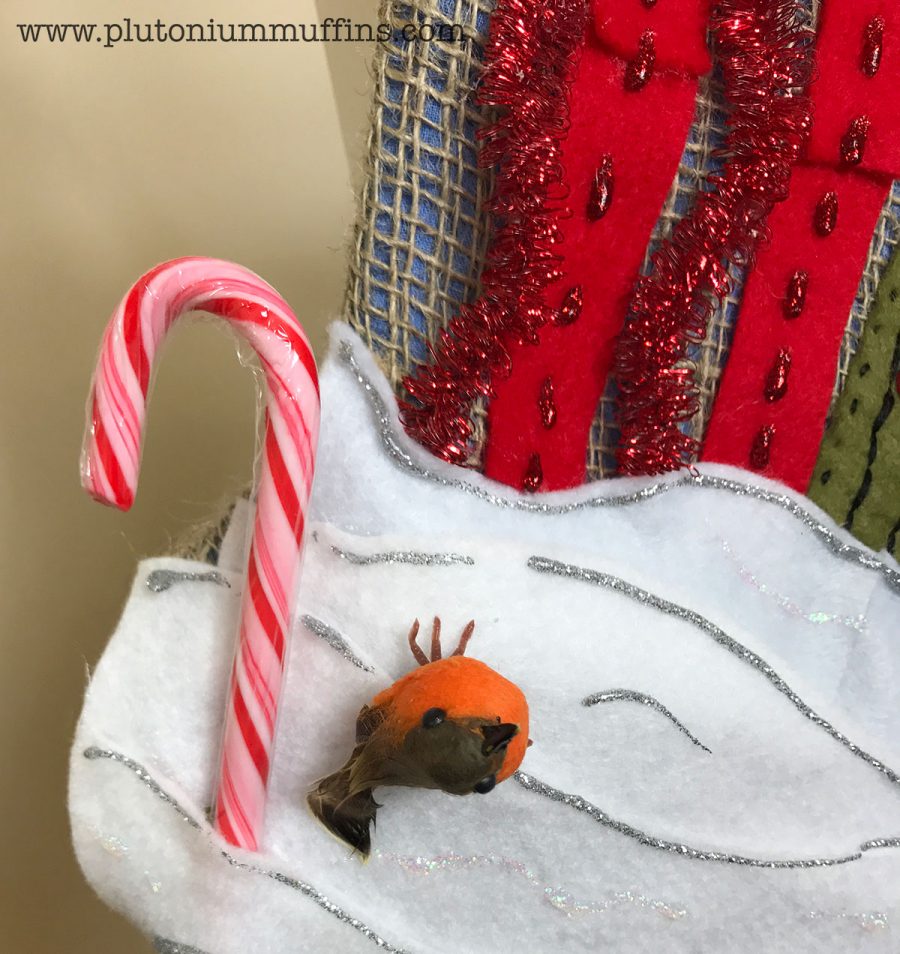
My favourite bits are the two robins and the pine cones, which I just had to cover in glitter. I had great fun, especially as I free styled and let things come to me as I played. I’m usually a ‘plan it all out in minute detail’ kind of person. It’s been a refreshing day just messing around with some crafty bits! I covered up all of my stitching with glitter glue and then regretted it straightaway. You win some you lose some!

The full stocking at a slightly different angle because I love it so much.
The stocking from the bottom up.
The stocking from the top down.
The second absolutely flipping adorable robin.

I can’t emphasise how much I loved this stocking, both from a ‘grab some craft bits and go nuts’ point of view, and for the finished product! If you find yourself with several hours free next December, grab some scraps of fabric and some spare decorations, and go nuts! You might be surprised by what you produce.

Much love,

Corrie xx

« Previous
 
Next »
Posted in Blog, FOs | Tagged , , , | 1 Comment

FIVE

Five years ago, I sat down in the lounge in a shared flat in Brixton, South London. There were things literally everywhere – a small trunk of yarn, a house rabbit in a cage, very poorly constructed sofas. John and I were in the beginning phases of our relationship, and one night he heard me moaning about my Blogger blog.

My lovely fellow
My lovely fellow

Five years of Plutonium Muffins

It was really important to me to have a blog. I was a student blogger for Imperial College for two years, I had a website as a teenager, and I’d always found writing a huge release. “Well,” said John, “lets make a blog for you on your own website so you’re in control of everything.”

I had literally no idea how to do that. My dad and brother had run my website when I was younger, Imperial College ran the blog there and blogger was, well, blogger. With encouragement from John (who in those days was known as JS), I brainstormed 100 names and put it to Facebook to vote on the most popular. Plutonium Muffins tied with another, and as it was my own first choice, I went with it! (Just as an aside – the other name that ‘won’ was “hatsnhugs”. I’m glad I went with my choice…)

Five years ago today we went live with this announcement!

Happy 5th Birthday Plutonium Muffins!Happy 5th Birthday Plutonium Muffins!
Happy 5th Birthday Plutonium Muffins!

In the time since we’ve had a lot of major exciting highs and also some pretty low lows. I’ve done a lot of travelling to wool shows and exhibitions and met some of the best people. I’ve given up full time work to pursue my crafty dream (twice!) and gone back to work realising it’s not as easy as it seems. I’ve branched out and now do ALL the crafts, not just knitting. I’ve started a YouTube channel, a Ravelry group and social media profiles galore. In all of it I’ve made some incredibly special friends, not least a friend for life in Australia and some cracking mates in the U.K. I’ve spoken to people in America, South Africa, Canada, the UAE, and most of my fans are actually in Russia! I’ve had two major mental health incidents. Through it all I’ve had Plutonium Muffins to dedicate myself to – some months more and some months not at all.

A friend for life, because of this crazy thing that I did!

I’m thrilled with all we’ve achieved together, and I can’t wait to enjoy the next five years with all of you! Thank you all so much for coming along on this journey. I’ll be doing a birthday giveaway, to be announced after Christmas as at the moment I’m busy trying to keep things together in all the madness. In the meantime, enjoy the latest PM pet, doing what she does best.

Tonks loves yarn.
Tonks loves yarn.
Even though it's like five times bigger than her!
Even though it’s like five times bigger than her!

For the rest of this month I’m challenging myself to blog using only my phone, so the format will probably change a bit. I hope you enjoy it!

Much love,

Corrie xx

Posted in Blog, News, Uncategorized | Tagged | 3 Comments

Easy Needlecase Tutorial (and Giveaway) | Sewing

I made a super easy needlecase for my lovely friend Nadine, and filmed the process to show you how I did it! I talked about the original project in a previous post. This is the step-by-step tutorial as shown on this video on my YouTube channel. For details of the giveaway, head on over the video to find out how to win the “sew” needlecase.

(This giveaway will close on the 30th of November, 2016.)

Easy Needlecase Tutorial

Before you start, choose the shape you would like your needlecase to be – I chose a hexagon. You are also going to do some very simple embroidery, stitching a word on the contrasting fabric. Choose that word now! I usually use names, but made this one a little more generic for the giveaway.

Assemble your equipment.

After you’ve assembled your equipment, you’re ready to go! I used a sewing machine as I had one – if you don’t, you can easily do these bits by hand.

Step One: Write chosen word on contrasting fabric.
Step One: Write your chosen word on the contrasting fabric.
Step Two: Backstitch word onto fabric.
Step Two: Backstitch the word onto the fabric.
Step Three: Use pinking shears to cut zigzag edge.
Step Three: Use pinking shears to cut zigzag edge (this step is optional, but if you don’t do it you will need to use fray stopper or sew a hem to stop the fabric fraying)
Step Four: Cut two of your chosen shape from main fabric.
Step Five: Cut two of chosen shape from fleece.
Step Five: Cut two of chosen shape from fleece (you can also use felt, but it is slightly bulkier and I’ve had worse results using it).
Step Six: Pin embroidered fabric onto one of main fabric shapes.
Step Six: Pin the embroidered fabric onto one of the main fabric shapes.
Step Seven: Top-stitch embroidered fabric onto main fabric.
Step Seven: Top-stitch your embroidered fabric onto the main fabric.
Step Eight: Trim the overlap and cut the excess lengths of thread.
Step Eight: Trim the overlap of your embroidered fabric and cut the excess lengths of thread.
Step Nine: Pin the main fabric to the fleece right sides facing (for both sides).
Step Nine: Pin the main fabric to the fleece right sides facing (for both sides of the needlecase).

From this point on, your sewing will be visible. Be as neat as you can!

Step Ten: Sew through both layers, leaving a gap to turn shape inside out.
Step Ten: Sew through both layers, leaving a gap to turn the shape inside out.
Step Eleven: Snip any corners off to reduce bulk when turning inside out.
Step Twelve: Turn shapes inside out (use something long to poke out corners i.e. screwdriver).
Step Twelve: Turn both shapes inside out (use something long to poke out corners i.e. screwdriver).
Step Thirteen: Turn hem on remaining unsewn side down and insert ribbon. Pin.
Step Thirteen: Turn a hem down on remaining the unsewn side and insert your ribbon. (Notice I used black here, but in my equipment pic it was white – I decided I preferred the width of this ribbon). Pin.
Step Fourteen: Trim ribbon.
Step Fourteen: Trim the ribbon.
Step Fifteen: Top stitch all edges of shape, ensuring you secure the ribbon and turned under hem.
Step Fifteen: Top stitch all edges of the shape, ensuring you secure the ribbon and turned under hem.
Step Sixteen: Thread key ring onto ribbon.
Step Sixteen: Thread a key ring onto the ribbon. This is optional, but something I find incredibly useful.
Step Seventeen: Turn hem on remaining unsewn side down and insert ribbon. Pin.
Step Seventeen: Turn the hem on the remaining unsewn side down and insert the ribbon. Pin.
Step Eighteen: Top stitch all edges of shape, ensuring you secure the ribbon and turned under hem.
Step Eighteen: Top stitch all edges of the shape, ensuring you secure the ribbon and turned under hem.
Step Nineteen: Trim all ends.
Step Nineteen: Trim all ends of excess thread.
Step Twenty: Fill with needles! Voila! Your super easy needlecase is complete.

I’ve been finding these needlecases really great, quick presents for friends who deserve a special something, and perhaps don’t have a basic sewing kit. Give it to them with some thread, pins and scissors, and you’ve set them up. Everytime they sew a button on they’ll think of you! WHAT a gift.

I really hope you find this useful – if you make one, I’d love to know! All my social media bits are linked on the right.

Much love,

Corrie xx

« Previous
 
Next »
Posted in Blog, Tutorials | Tagged , , , , , | 1 Comment

Uniball pens – Posca and PIN | Review

I got sent some Uniball pens a few weeks ago and have been absolutely dying to have a chance to sit down and use them. With all the weddings and moving out of the way (just about), I’ve managed it! It does also help that with half term, all of my after work activities were cancelled!

The pens I was sent by Uniball.

I was sent these pens for free, but I would never give a fake review. All views are my own!

Uniball Craft Pens

If you head on over to the Uniball website, the pens I was sent sit rather fittingly in the Craft range. I didn’t choose them – the options were a little overwhelming when I was given the choice, so this was what I said:

Perhaps you could send me a small selection of pens that write on ceramic, paper and fabric?

He made a (great) judgement, and sent me a set of eight Posca pens and three from the PIN range. You can check out ALL the Uniball products here. (Don’t blame me for any purchases that occur as a result of this link…)

Posca

The Posca markers come in loads of different colours. I was sent red, blue, yellow, green, white, black, gold and silver. They write on basically everything! Officially, this is: ceramic, glass, metal, mineral (i.e. gemstones), paper, plastic, textile and wood. When you first open them, the nib is completely white and you have to get the ink running. I was so excited about this, I filmed it.

The pens are really cool to write with when the ink is flowing really well. The first thing I did was label some kitchen stuff. It worked really well, although the drying time is quite long and YOU MUST WAIT FOR IT TO DRY. John and I were walking around with white smudges on us for a little while! It’s stood the test of time – a month later the writing is as good as new, and I now never get served builders tea. Win!

This has revolutionised my life.

Plastic

Having received the pens, I decided to refresh the decoration on my sewing machine. I had drawn on it in Sharpie years ago, and although that lasted well, I had been debating a change for a while. Nail polish remover got rid of the old decorations, and I went to town with new ones. (There are videos of this on my YouTube channel if you’re interested.)

My sewing machine with its old Sharpie decorations.

The drying problem came up here again – me, the table and half my belongings got covered in ink when I was careless. However, I loved the result, and any bad result here was my poor drawing skills and not the pens. I’ve not yet used the sewing machine, but I left the actual working parts clear. You know, just in case.

To get the ink to stay to the plastic, I had to clean it all with rubbing alcohol first. Before then, it just seemed a bit like it didn’t want to stick. (If I say the word hydrophobic/like oil and water, does that make sense?) After the rubbing alcohol it was much easier.

The top of the sewing machine with its new design.
The sewing machine from the front.
Close up of my favourite bit on the sewing machine.

Other mediums

I drew on fabric just to get an idea of how they go, but it’s not a good sample. I hate the writing, and I’m not sure how permanent the pens would be on anything exposed to water. The website shows an example of use with fabric using Converse – I MUST TRY THIS. (If you don’t know how much I love decorating Converse, I refer you to this post.) Watch this space.

Testing out the pens on fabric. Not convinced.

On paper, the pen works well, but it tends to strip it. I don’t really know how to describe it – you know when you get paper a little wet and it sort of shreds? You can see a bit of the top layer in the below photo. I’m not sure how much I would draw on paper with them, to be honest. They do blend nicely though, and when you draw on top with the PIN fineliners the result is lovely. I withhold judgement for now.

The paper, for the sake of completeness, is from a Winsor & Newton sketchbook, and super thick.

In the green/yellow blended section you can see how the page got shredded slightly.
A full 'doodle' page.
A full ‘doodle’ page.
Messing around with some blending and different speeds of writing to check ink flow.
This smudging was deliberate. I hate it.

All in all, I loved the Posca pens for slightly strange uses like in the kitchen and will be cracking them out a lot more in the future! I may not be keeping the sewing machine decorations on the top though – they’re a bit much, even for me.

PIN

The Uniball PIN pens (try saying that ten times fast) are old friends of mine. I’ve used them for years in whatever doodling I’ve done, although I’ve never had my own new set as I’ve always nicked my mum’s. (Sorry Mum!) They are just generally awesome pens for fine art work. I did a lot of doodling using the 0.1, 0.3 and 0.5mm nibs, which is what Uniball sent me, and the only complaint I have is that if you move the pen too fast on thick paper, the ink can be a bit patchy.

I absolutely love the effect of the PIN on top of the Posca. A massive win!
Trying out the effect of shading with different size nibs.

For normal A4 paper and general fine liner/art use, these pens are fantastic. I can’t say enough good things about them. My interest in art has also been rekindled by the package, and I’m sure you’ll be seeing more posts about art soon.

So there we go! My thoughts on the Uniball Posca and PIN pens. As I say there are a few action vids on YouTube – all that’s left for me to do now is go back to my craft room and start doodling…

Much love,

Corrie xx

Posted in Blog, Blogjacking | Tagged , , , , , , , | Leave a comment

Needlebook for Nadine | Sewing

Time for a break into some sewing, and a needlebook with a bit of freehand embroidery. With a big birthday coming up, my friend Nadine came over for a cuppa one evening and made a throwaway comment that got my grey matter going. “Could I borrow a sewing kit?” I dug out a pair of jeans I had cut into 4”x4” squares for a different project that never happened, and got researching.

Needlebook for Nadine

When I knitted the Tetris Scarf for John a couple of years ago, I had a problem with it curling. I bought a piece of blue fleece and backed it to stop the curling (which worked really well as an FYI). Of course, cutting a slim rectangle out of a large piece of fleece means I have literally tons of this fabric left, and I’m trying my best to use it up. This was the perfect excuse.

I changed the squares of denim into octagons. The octagons were meant to be hexagons, but I suffered some sort of brain fart and when I counted the edges, realised something had gone fundamentally wrong. Provided the shapes weren’t squares, I was happy, so I cracked on. The freehand embroidery bit was done using black thread on a piece of spare calico I had lying around.

Freehand Embroidery

I’m going to take a minute to talk about freehand embroidery, and how awful I am at it. I have literally broken a sewing machine trying to do it in the past. I’m normally pretty good at judging tension, which is fine as long as the feed dogs are working. To do freehand embroidery, you cover the feed dogs (which in case you don’t know, are the jagged teeth like things that pull your fabric under the needle during normal operation of a sewing machine). This means there’s nothing moving the fabric apart from your own hands, and you have to time it with the needle to make sure you’re not tugging the material while the needle is in it, hence snapping a needle.

The front of the book, with my disastrous freehand embroidery!

I did a lot of practice runs on Nadine’s name, all of which I discarded. Eventually I put it in an embroidery hoop to hold it taut, and used the edges of the hoop to manipulate the fabric. I think it came out quite well (you can ignore the ‘e’, which went on a mad bid for freedom…in the wrong direction). Writing this one name with my machine took, with no exaggeration, an entire evening. At one point John came into the craft room, saw me sitting with my head in my hands, and reappeared slightly later with a chamomile and honey tea. What a man!

Finishing the needlebook

The rest was relatively easy. I attached my scrap of calico with the name on it to one of the pieces of denim. Then I cut out four fleece octagons, and sewed two of them onto the denim leaving a hole on one side of each. I turned these inside out, ironed them and did some top-stitching around the top of the octagons to seal them. Voila!

The inside of the book with a selection of needles for Nadine to use.
The back inside cover, with a "handwash only" label loosely sewn in, in case she wants to take it out.
The back inside cover, with a “handwash only” label loosely sewn in, in case she wants to take it out.

I’ve since made more of these – you’ll find out more soon. I loved doing something on the sewing machine that was super quick and super rewarding. It makes a great birthday present, and I’m going to make this a staple in future!

Back of the needlebook.

I’ve filmed a step-by-step video of this process so you can make your own needlebook. I think this post is long enough for now so I’ll share that with you another time!

Lots of love,

Corrie xx

Posted in Blog | Tagged , , , , , , | Leave a comment

Completed Kitty Ring | Silversmithing

The last time you saw the kitty ring, it had just had its ears soldered on and was ready to be cleaned up and turned into an actual ring! I finished it a while ago and have been wearing it with pride since. It even came to Italy for a wedding when it wasn’t quite ready for wearing out and about. I was just too proud!

I’m doing a silversmithing course with Alice Goldsack in Bristol. More information here!

First…a kitty face

After soldering the ears on, I filed the ends of my piece of silver so they were both flat. I had planned to leave it at that, but the week between lessons gave me some ideas, and I decided to use a ball hammer to put a texture into the ‘non cat’ parts of the ring. Eyes and a nose went in using some unidentified tools I found on the side. I was really, really pleased with how it came out. The perfection of this was totally accidental – I had no idea the nose would sort of stick out like it does (hopefully you can see well from the photo). The kitty had a face! 

Getting ready to put a hammer to my work. Nerve racking moment!
Finished texturing and giving it a personality.

Then I used a piece of equipment called a mandrel to hammer the flat rectangle into a ring. You do this using a leather or plastic headed mallet to prevent marking the silver. With all the effort I’d gone to hammering my texture in, it would have been really annoying to then hammer those out when bending the ring. This part of the process was really, really hard!

I eventually got it into the ring shape, and used some pliers to make sure the ends met properly. This was something I needed help with, and the value of having the teacher there was immediately realised as I would never have known to do what she recommended unless I’d asked. It was time to do some soldering!

I forgot to take a photo of it before soldering, which is why it's this colour. Anyway, this is the ring on the mandrel.
I forgot to take a photo of it before soldering, which is why it’s this colour. Anyway, this is the ring on the mandrel.

Joining it up

Soldering is a process that fascinates me. It’s basically magic! Once the solder pieces melt you have to drop it into an acid solution (I’m not entirely sure why) and the metal gets discoloured. The yellow bits you can see in the picture are the solder, which I hadn’t filed down properly. 

Those tiny bits of metal on the front of the block are my pieces of solder.
This is the position the ring was in when I did the actual soldering.

After joining everything I had a kitty ring! It was time to neaten it up, sandpaper it and give it a polish. The polishing is done using a big wheel, which I vaguely remember from design tech lessons as a teenager. Something you never really think about is how conductive silver is. The ring got incredibly hot, incredible quickly and I had to keep taking breaks to avoid burning myself.

The finished product is something that I’m ridiculously proud of. It’s actually really hard to wear – the ears catch on everything, so I’ve learned a lesson there. However, for a first piece of jewellery, I couldn’t have asked for more of myself. 

After filing the eyes were a bit nondescript. I slipped when redoing the right hand one....it's just added character right?
After filing the eyes were a bit shallow. I slipped when redoing the right hand one….it’s just added character right?
Clutching an ancient oak tree at the top of a tower in Italy. (The other hand is John's).
Clutching an ancient oak tree at the top of a tower in Italy. (The other hand is John’s).
On a fancy box for fancy photography (and to show you how the solder join looks after polishing!)

I’ve already finished my second piece, so you’ll see that in my next blog post (or go to this YouTube video for a sneak preview). I’m really enjoying these lessons! Watch this space…

Much love,

Corrie xx

This slideshow requires JavaScript.

Posted in Blog, Silversmithing | Tagged , , , , | 1 Comment

Craftisan – John’s favourite ever craft shop

When we moved to Bristol I posted a long post about moving, and promised I would tell you all about Craftisan, our local craft shop. It’s taken me so long to do so that I’ve been able to go back and take MORE photos – which is also kind of neat because now I can show you how they change up their decorations regularly. We haven’t visited for a while, but every time we do, it’s a great experience.

The front of Craftisan in June.
The other side of the shop front.

Craftisan, Totterdown’s craft cafe

The first thing to say about Craftisan is that it’s a craft shop and a cafe. This is partly what makes it John’s favourite ever craft shop. He can come in with his laptop, buy a cappuccino and cake, and chill while I inspect everything in minute detail. The coffee is great and the cake is always delicious. I also enjoy the availability of a number of local presses – particularly the elderflower presse. Om nom nom.


The shop is also sort of a gallery, with local art on the walls, much of it for sale. The artists change regularly, and you can also buy the art in the form of cards and postcards in the shop. This is now my place of choice for birthday cards. There was a gorgeous painting of a bumblebee when we first visited in June, which I didn’t buy. I can’t stop kicking myself now that this painting is sold and no longer available!

There is a table in the back of the shop with a load of different materials available – paper, card, paint, feathers, glitter, glue, paintbrushes – and you can go and create something while you enjoy your beverage or snack. While the craft table is aimed largely at kids, it would also be awesome if you just wanted to go and experiment. Did I mention the glitter?? A family with three kids spent an hour painting the last time we visited. It was so lovely to see and reflect on how, in a few months, we could be doing the same with John’s niece and/or nephew!

The craft table ready to be used on a creative whim.
John enjoying the delights of Craftisan after we viewed our house in June.

OK, on to the actual shopping bit.

Craftisan the shop

I have to remember how small the shop is whenever I go in. The available range is almost unbelievable! With everything from decopatch, to wool, to fabric,  I can spend hours perusing the shelves. For my fibre interests there is 100% Australian wool yarn, beautiful wool roving and a selection of accessories. In terms of material, Craftisan stocks a small amount of fabric, rotary cutters, all the sewing accessories, and a ton of buttons.

The shop also caters for papercraft with card stock, stamps, inks and stickers in abundance. Kits for crafty beginners range from sock monsters to candle-making, with more in between. The most beautiful cards, notebooks and pocket colouring books are for those who love writing and colouring. For collectors of books, there are trunks of vintage patterns and books ranging from sewing to painting. For non-crafters, a variety of items from local crafters include teapots, lampshades and exquisitely decorated boxes.

Wool! This has changed drastically since June, with Melbourne wool now on offer.
Decopatch animals ready to be covered.
Beautiful greetings cards.

It’s difficult to give any more information than this. Everything changes regularly, and it’s a bit like Aladdin’s cave; every time you visit you see something new. I’ve never managed to visit without buying something…we walked away with this amazing file organiser for John’s office this weekend. His exact words were “I don’t know if I’ll use it but LOOK AT IT.”

I get teased by friends who think it’s hilarious that we took our house because of a craft shop. I can’t pretend it wasn’t a factor! Craftisan also runs classes ranging from after school clubs to skirt making and beyond. I’m sure at some point I will get myself on a course, and if I do I will let you know how it goes.

Much love,

Corrie xx

This slideshow requires JavaScript.

Posted in Blog, Reviews | Tagged , , , , , , , | 4 Comments

Crazy cat lady silversmithing update

Before I went on my silversmithing course last week, I spent ages browsing Pinterest looking at jewellery. As a dedicated cat lady, there was really only one choice – a cat ring! You can check out the jewellery board here. I will be updating it a lot more over coming weeks – especially because I’ll be getting a new phone that will make Pinteresting a bit easier!

Anyway, on to how I’m a dedicated cat lady. No, wait, silversmithing..! The finished project can be seen in this post.

Intro to Silversmithing – the first class

I went to my first class last Thursday (read more about that here). The studio is in Central Bristol, in an absolute maze of a building! It looks totally nondescript from the outside. Walking in reveals a transformation from standard residential building to incredible silver studio, complete with faux taxidermy silver stag head! Alice Goldsack has decked out her studio with rows of benches for people to work at, beautiful photography on the walls, and display cabinets of examples of silver work by established smiths.

I didn’t take any photos of the studio as we were busy learning the ropes. I will try do this next lesson. There was so much to learn – hammering, annealing, soldering, polishing, work hardening… I also don’t want to take any photos of my fellow students as that gets complicated, so please bear with me.

Sneak preview! Sketching some ideas in the studio.

What was quite strange was suddenly encountering techniques that I have studied the science of through my Materials Science degree, in a practical application. Even stranger, my brother gave me a jewellery textbook for Christmas a few years ago, which is one of those in the studio. Although it was a new environment for me, I felt like I was right at home.

After a chat about health and safety and some equipment demonstrations, it was time to start.

Cat Ring

Having had a look at the equipment, I went and voiced my thoughts to Mim, the tutor for the lesson. I’d initially thought I would do a wire ring bent in the shape of cat ears, but that would have had fewer techniques in it. I want to learn as much as possible, so it had to be more complex. I ended up getting a flattened piece of silver and cutting it to size to fit my right index finger, then cutting little ear pieces.

A length of silver for my ring, with two little ears.
A length of silver for my ring, with two little ears ready to attach.

After filing rough edges down I soldered the ears on. The pieces were tiny, and very difficult to manipulate, and because I hadn’t done it before it was very tricky. I also suddenly realised I had an audience of everyone else in the class, as I was the first person to solder. Terrifying. It went quite well, and I definitely felt very accomplished!

My cat has ears! You can see the lumps from the solder.

I had to file down the excess solder, then file the ends to join the metal into a ring. By this point it was time to leave, so next week I will be doing a bit more filing. Then I will be bending it into a ring and soldering. Hopefully I’ll finish it next lesson and be able to wear it with pride!

My cat, soldered, filed and ready to turn into a ring!

I can’t wait till Thursday’s lesson – I’ll keep you updated.

Much love,

Corrie xx

Posted in Blog, Silversmithing | Tagged , , , , | 3 Comments

My Kryptonite – also known as picking up stitches

Kryptonite is a weird way to be talking about this project. The naming happened organically and now I can’t help it! I’ve been talking about my mum’s birthday present for months, without ever having actually shown it to you. The time has come to talk about it (which meant I had to take it out to take photographs, and this will mean it’s far more likely to get finished as I’ve actually snuggled it in my hands again…)

Kryptonite, in the form of…

At the beginning of the year, my lovely mum and I were walking around the local town and we happened across a new yarn shop. Oh joy! We had to go in. I had a look around and spotted some of the new Sirdar Touch yarn that was so popular at the beginning of the year. As I was showing it to mum, the owner of the shop (True Design) picked up a lovely cardigan/tunic garment that was hanging near the till and showed it to us. It was absolutely beautiful – a nice length and so very comfortable. Mum expressed a desire to own one like it. Before I knew it, I had bought enough balls of Sirdar Touch to knit her the tunic.

The fluffiest, most comfortable kryptonite in existence.

Fast forward to May – on mum’s birthday I held up the half knitted article for inspection. I had got to a specific length and stopped, because I wanted to know her preference. The length was a little short for her taste, so I was glad I did – I knitted a bit further and bound off. I sewed it together and….stopped. It only needs a collar – with 12mm needles it would probably only take half an hour to knit! Here comes the Kryptonite part of the story.

This yarn, while absolutely gorgeous, soft, comfortable and so very, very warm is a nightmare for picking up stitches. It would already be hard to pick up the edge stitches to knit the collar because it’s black. And then we jump straight to the fact that it’s eyelash yarn. I’m not super comfortable picking up stitches anyway, despite having taken a finishing course at Spin a Yarn a few years ago. Combine that with the fun of the black eyelash yarn, and the fact that it was coming up to summer, and you understand why it’s taking me literally months to finish this off.

Its difficult to give an idea of scale, but its not small!
The garment as it is at the moment, awaiting a collar.

I know that I’ll probably pick the garment up and half an hour later wonder what the months of fuss was about…and I know that mum will love it, so I need to get it to her in time for winter (let’s not forget her birthday was four months ago). Picking up stitches has been my kryptonite for so long. Even when Melanie was staying in 2015 she picked up stitches for me on any projects I left lying around!

Hopefully this is only the first of two posts about this project – the second being the FO! I’ll let you know how I get on. I’d love to know if I’m the only person with this problem, and how to overcome it? (Apart from doing a load of knitting that requires practice, practice, practice…) What is your kryptonite?

Much love,

Corrie xx

Posted in Blog, Knitting | Tagged , , | 4 Comments

Silversmithing with Alice Goldsack in Bristol

Silversmithing?! That’s nothing to do with knitting! I know, I wasn’t sure how to make it fit either – and then I decided that rather than start a new blog for this new craft, I could just talk about all my crafting. I didn’t want to set up a whole new blog with web domains, new designs and a new name, and this is, as they say my party. So, silversmithing with Alice Goldsack.

Rewind to July’s birthday…

Back in July, I celebrated my birthday with over an elderflower gin and tonic. John had packed me off to work that morning with a Sesame Snap and a sweet note, which in all honesty was enough for me. Birthdays are something that I love celebrating for other people, but am not so hot on celebrating for myself. Too much attention!

Celebrating my birthday with friends in Bristol!
Celebrating my birthday with friends in Bristol.

Imagine my surprise when over that gin and tonic, John told me that my friends had clubbed together and contributed to a silversmithing course! The one he had looked at was at Halsway Manor, which I’ve talked about before in this post. This would be a residential weekend in November, which I could either go to alone, or take a friend. I was tickled absolutely pink, and the following morning at work waxed lyrical about it. One of my colleagues overheard me and told me another of my colleagues did silversmithing in Bristol. I went and chatted to her about it, and before long decided that I’d rather do the course with Alice Goldsack.

It turned out to actually be cheaper than the weekend John had looked at for me. With a twelve week course based in my home city, I felt it would also be better value for money. The added bonus would be meeting creative people who live in Bristol too. Additionally, if after my twelve week course had finished, I decided it was something I wanted to keep doing, it would be totally possible for that to happen. I suspect it will.

The Actual Course with Alice Goldsack

Alice Goldsack is my new silversmithing teacher.

My first class is today, and I’m nervously excited. I’ve never done something totally new like this – I’ve dabbled in jewellery making before, but silversmithing goes one step more basic/complex, and involves shaping the raw material as well as assembling it. Instead of just using jump rings, I’ll be making them! The nervousness comes from the anxiety of being in a group of people, something I’m currently struggling with.

My teacher will either be Alice Goldsack or one of her tutors. She has kindly given me permission to take photos during class, so you can expect lots of pictures! I’ll let you know how it goes, without giving away the secret sauce.

Much love,

Corrie xx

PS If you’re one of the friends who contributed to this and I haven’t thanked you yet, it’s because I don’t necessarily know who you are! I’m on the hunt for more information from the elusive JS.

Posted in Blog, Life, Silversmithing | 4 Comments