Time for a break into some sewing, and a needlebook with a bit of freehand embroidery. With a big birthday coming up, my friend Nadine came over for a cuppa one evening and made a throwaway comment that got my grey matter going. “Could I borrow a sewing kit?” I dug out a pair of jeans I had cut into 4”x4” squares for a different project that never happened, and got researching.
Needlebook for Nadine
When I knitted the Tetris Scarf for John a couple of years ago, I had a problem with it curling. I bought a piece of blue fleece and backed it to stop the curling (which worked really well as an FYI). Of course, cutting a slim rectangle out of a large piece of fleece means I have literally tons of this fabric left, and I’m trying my best to use it up. This was the perfect excuse.
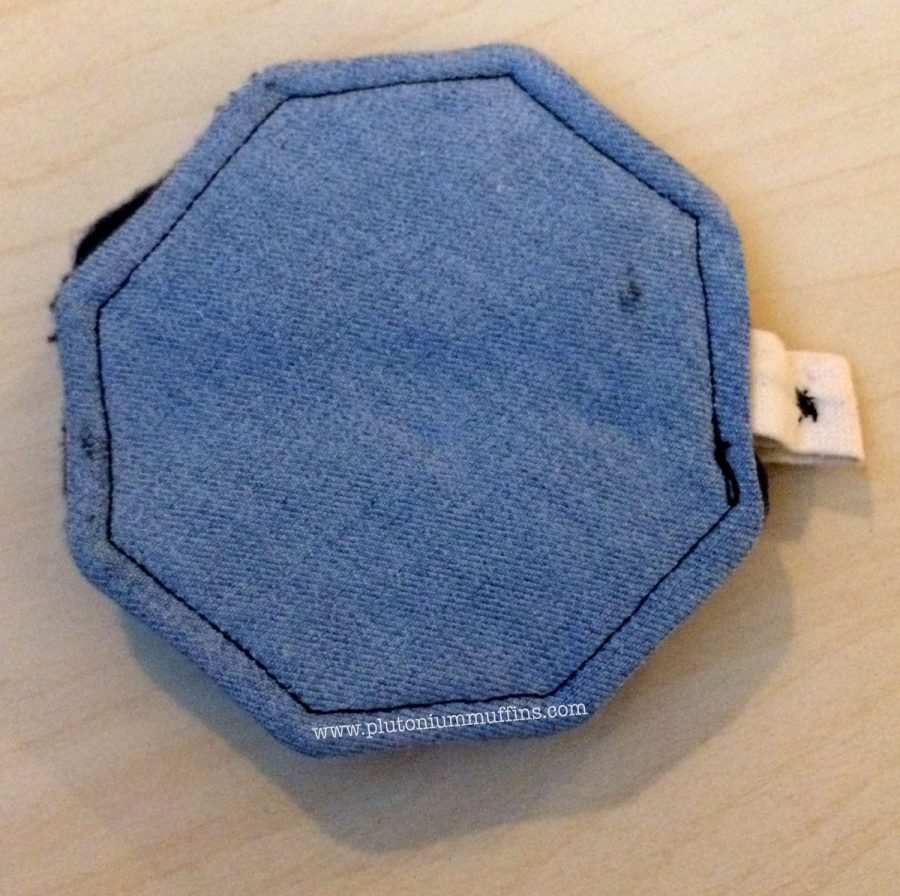
I changed the squares of denim into octagons. The octagons were meant to be hexagons, but I suffered some sort of brain fart and when I counted the edges, realised something had gone fundamentally wrong. Provided the shapes weren’t squares, I was happy, so I cracked on. The freehand embroidery bit was done using black thread on a piece of spare calico I had lying around.
Freehand Embroidery
I’m going to take a minute to talk about freehand embroidery, and how awful I am at it. I have literally broken a sewing machine trying to do it in the past. I’m normally pretty good at judging tension, which is fine as long as the feed dogs are working. To do freehand embroidery, you cover the feed dogs (which in case you don’t know, are the jagged teeth like things that pull your fabric under the needle during normal operation of a sewing machine). This means there’s nothing moving the fabric apart from your own hands, and you have to time it with the needle to make sure you’re not tugging the material while the needle is in it, hence snapping a needle.
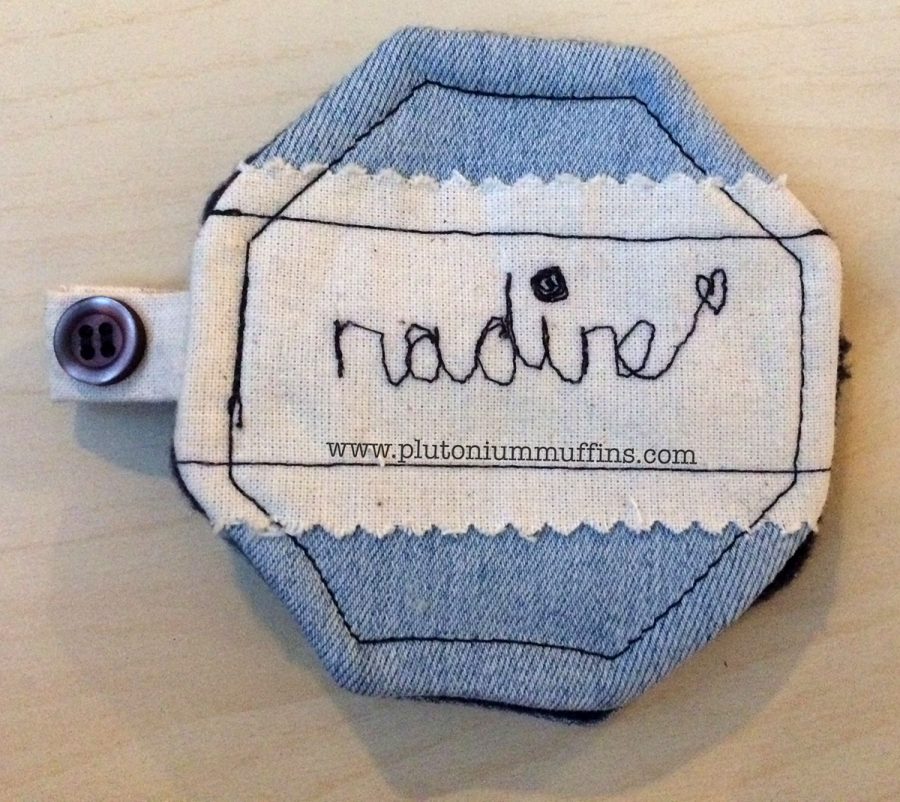
I did a lot of practice runs on Nadine’s name, all of which I discarded. Eventually I put it in an embroidery hoop to hold it taut, and used the edges of the hoop to manipulate the fabric. I think it came out quite well (you can ignore the ‘e’, which went on a mad bid for freedom…in the wrong direction). Writing this one name with my machine took, with no exaggeration, an entire evening. At one point John came into the craft room, saw me sitting with my head in my hands, and reappeared slightly later with a chamomile and honey tea. What a man!
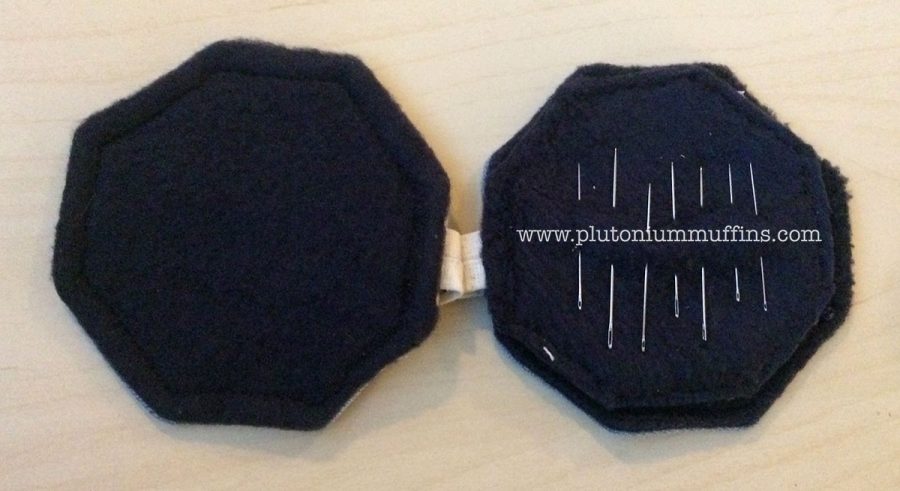
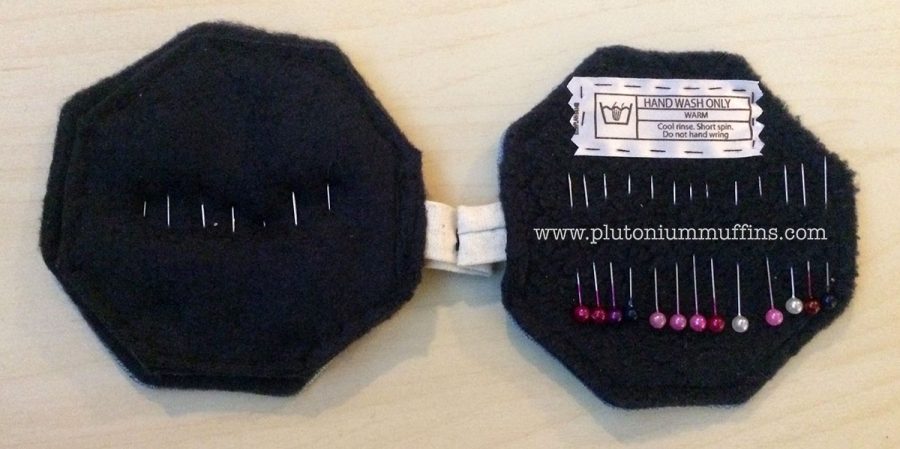
Finishing the needlebook
The rest was relatively easy. I attached my scrap of calico with the name on it to one of the pieces of denim. Then I cut out four fleece octagons, and sewed two of them onto the denim leaving a hole on one side of each. I turned these inside out, ironed them and did some top-stitching around the top of the octagons to seal them. Voila!
I’ve since made more of these – you’ll find out more soon. I loved doing something on the sewing machine that was super quick and super rewarding. It makes a great birthday present, and I’m going to make this a staple in future!
I’ve filmed a step-by-step video of this process so you can make your own needlebook. I think this post is long enough for now so I’ll share that with you another time!
Lots of love,
Corrie xx