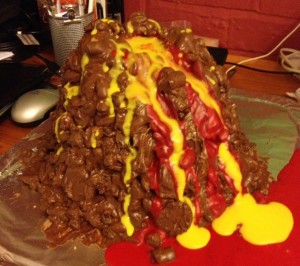
I had to make a volcano cake today. Why? Because Mr Turtle, a geologist, entered a new era of age today and we had to make him a cake! As he is a geologist, we wanted to make something related to geology, and JS had the brilliant idea.
Unfortunately, the recipes we found for volcano cakes were Not Good. There’s hardly anything on the internet. I had to improvise, and JS wants me to share the recipe with you because he says it is Good.
Volcano Cake Recipe
Sponge Base
The sponge base is made up of four layers of cake. If I had four different sizes of pan, I would have used them, but instead I used three because I couldn’t find something suitable in the cupboard. I based the sponge on a Mary Berry Victoria Sponge recipe, which I was a bit dubious about because you put everything in at once. The blender was as well; I had to blend it by hand in the end! However, to make the volcano effect and for my own comfort as I know the chemistry of baking powder, I did alter the recipe, so here it is.
Make this twice in separate batches. This allows you to separate out the steps, and also ensure you have enough space in your oven! You want to end up with four base cakes. It’s also important to use gel-based food colouring, as if you use anything too runny then it will bleed into the rest of your cake and you won’t get good definition.
Key Ingredients
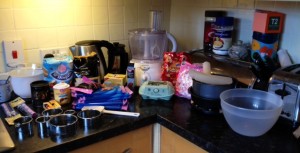
225 g unsalted butter
225 g caster sugar
4 eggs
225 g self-raising flour
2 teaspoons baking powder
Extra Ingredients
Cocoa powder
Red and yellow GEL food colouring
Vanilla extract
Equipment
4 round cookie cutters of differing diameters
3 or 4 cake tins of differing diameters
Method
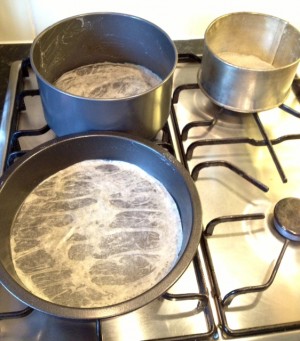
1. Preheat oven to 180 degrees Celcius, grease and line trays with parchment paper.
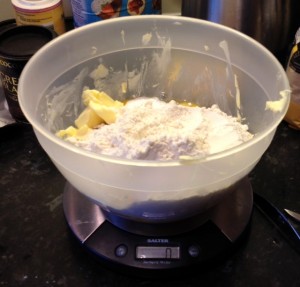
2. Put all of the key ingredients in a bowl except the baking powder, and blend until just mixed. When you are ready to start mixing colours in, add the baking powder and vanilla extract – the baking powder starts to work as soon as it gets wet, so try be as quick as you can from this point on.
3. Separate into three bowls of roughly equal proportions. Put half a teaspoon of cocoa powder in one, a full teaspoon of cocoa powder in the other, and a good squirt of colour in the other. The first time you do this mixture, use yellow colour, the second time you do it, use red.
4a. Put the biggest cookie cutter in the centre of your biggest cake tin. Fill the cookie cutter with yellow sponge mixture. Around the outside of the cookie cutter, put a layer of darker sponge mixture (the one with a full teaspoon of cocoa in it), then cover it with another layer of lighter sponge mixture. Try match the height of the mixture in the cookie cutter with the layer on the outside.
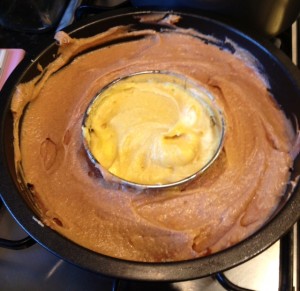
4b. Repeat this step with the second largest cookie cutter and cake tin.
5. Pull out cookie cutter and smooth join with a knife. Place in oven for around 15 minutes – but keep checking each individual cake because the differing diameters and corresponding thickness will affect the cooking time.
6. When a skewer inserted in the centre comes out clean, remove from oven and place to one side in the tin to cool.
7. Repeat steps 2 to 6, ensuring you use red food colouring this time, and your two smallest cake tins.
8. When your cakes in the tins are warm, turn out onto a cooling rack.
Go off and do some knitting for a while as you wait for your sponges to cool. Come back again sometime later and check they are cool with a (clean!!) hand.
When the sponges are ready, stack them up in descending height order – the biggest at the bottom and the smallest at the top! You may want to trim the domes that develop unless you are a super-star baker (I’m definitely not). I used these to give my cakes a bit less of a tiered pyramid shape.
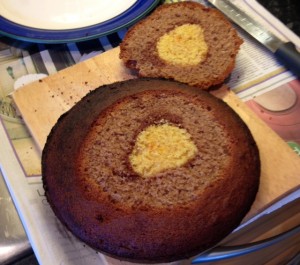
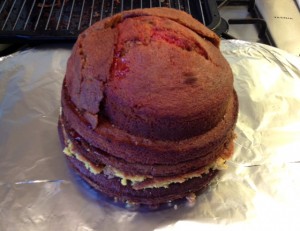
I glued the whole thing together with strawberry jam – I should have used apricot but I didn’t have any. No biggy.
Rocky Road Icing
Mr Turtle loves rocky road (if you don’t know what that is, I think it’s a mixture of chocolate, dried fruits, nuts, biscuits, marshmallow, etc etc). I’ve made it before, but I couldn’t find the recipe I used, so I improvised. We decided to use it because it also gives a fab texture to the side of the volcano – it definitely looks extremely mountainous with little rocks and things that tumble down. Anyway.
Ingredients
5 fruit and nut chocolate bars
Dried cranberries
Bite-size biscuits (I used Maryland Cookies)
Small marshmallows
Method
1. Put the smallest cookie cutter on the top of the cake.
2. Melt four of the chocolate bars over a pan of hot water. The best way to do it is to just break up all the chunks and throw them all in the bowl, then leave it. Do not get water in the bowl, and watch like a hawk to make sure it doesn’t burn.
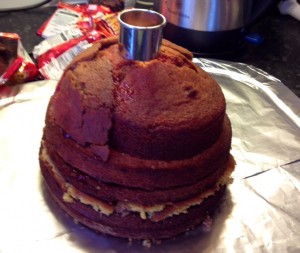
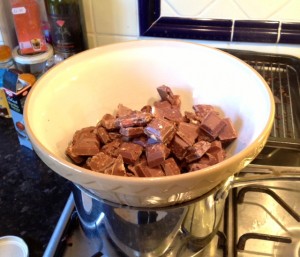
3. When all the chocolate has melted, add the cranberries, biscuits and marshmallows.
4. Stir and make sure that you coat all the added extras in chocolate.
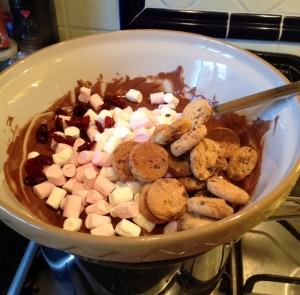
5. Spoon onto the cake. Try get it to stick to the sides – it will naturally want to pool at the bottom, but push the bits up and keep building to make sure it covers the whole cake.
6. Stack some of the biscuits around 2/3rds of the cookie cutter to create a crater effect.
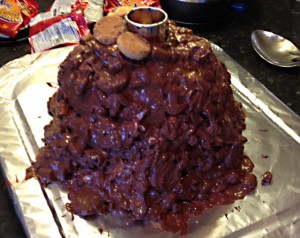
7. Melt the last chocolate bar and spoon it over the biscuits you’ve just added. Try fill in some of the gaps that have been left.
8. Leave to set in a cool place for a while. Remove the cookie cutter when the chocolate has set.
Glace Icing
Every volcano needs lava, right? You’ve put a lot of effort into building a lava chamber up the centre of the mountain, now you want a big flow of lava down the side.
Ingredients
225 g icing sugar
15 ml warm water
Food colouring – red and yellow
Method
1. Mix the water into the icing sugar slowly until it is just runny. Don’t make it so runny that it will never set. You want it to be the consistency of really thick custard.
2. Mix plenty of red food colouring in. If you don’t put enough, your red lava will turn into slightly weak and girly looking pink.
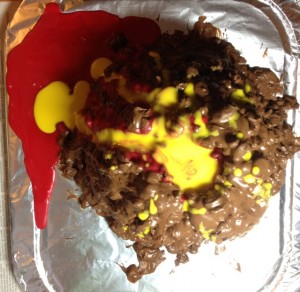
3. Pour your glace icing into the crater. It should overflow in the 1/3rd that you didn’t build up with cookies – make sure you place your cake on a board that will allow for this.
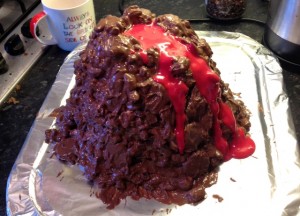
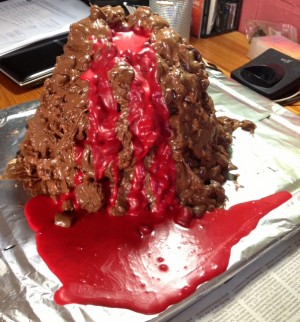
4. Leave in a cool place to set.
5. When the red has set, mix up another batch of icing sugar as in step one, and put plenty of yellow in. Again, make sure you have enough otherwise it won’t stand out enough. Pour it over the top of the red.
Eat!
Voila! Your cake is done. Don’t fret too much about anything while you’re decorating, it’s all fantastically messy and fun (I used my hands a lot) and my constant solace while I was trying not to mess up was “at least it has so much sugar in that they won’t notice if it looks bad once they’ve taken a bite”.
This is NOT a cake you should make if you’re trying to lose weight, or are on a sugar limited diet. I trust you know your own limits!
Enjoy!
Much love,
Corrie xx




It tastes REALLY good. Om nom nom nom.